There are generally only two seasons in Chicago: sunny and
gray. Construction and winter. We’re still somehow in construction despite the changing
thermometer readings and the roadways are getting worse rather than better but
at the same time, we’ve far too quickly switched to gray. As it
goes here.
This is a long way to say, it’s a gray, dreary day here in Chicago, these
photos ahead may be compromised but it’s a great day to bake. As is
any day, every day heh, in my opinion.
My dad is a huge fan of Boston Cream Pie. Is it creme or is it cream? Regardless. Huge. His favorite. A highlight of my youth was watching the sheer joy come over him upon receiving one from my mom, his smile and happy blue eyes seared into my memories. It was always a big deal.
Plus too, sharing this recipe with you is extra fun for
me as it’s an excuse to try out my brand spankin’ new muffin tin. My
previous one, nothing fancy, was really suffering the ol’ blueberry stains but I ended up destroying it (unintentionally, I swear, I swear) making
Mike some breakfast egg muffin cups.
Plus the days are definitely getting shorter, cramping my wildly erratic
baking schedule. Sigh.
Anywhoooo……
My dad is a huge fan of Boston Cream Pie. Is it creme or is it cream? Regardless. Huge. His favorite. A highlight of my youth was watching the sheer joy come over him upon receiving one from my mom, his smile and happy blue eyes seared into my memories. It was always a big deal.
Whenever I saw that mysterious box of Jiffy chocolate stuff out, the stuff
my mom would mix up I think with water as the chocolate topping, I knew we
were in for a glorious treat that evening.
Before you ask, yes, I made him one for Father’s Day this year but I’ll get
to that another time. Bubbling over with recipes to share over here!
But one casual parent dinner invite evening here, I decided to veer from the
traditional and make a cupcake version I had discovered over on The Kitchn, indeed, Boston Cream Pie Cupcakes. And wow, boy, wow, am I sure glad I did because wow, holy crap, this recipe
is good. Gooooood. Good
good good.
Note: you will make a
mess all over yourself eating these. Other note: who
cares.
Yeah, there are a few steps, yeah it’s not a bake-n-frost, but I promise you
these are so worth it. And don’t fret, they’re not complicated to make. Seriously.
Alas. Ah well.
This is definitely the most expensive muffin tin I’ve ever purchased and the
most research I’ve ever done, heh, on which one to get (?!) but I figure hey,
if I’m hardcore baking more now, the tools gotta stand up.
Amiright or amiright?
Well, it performed very nicely. I read you don’t need paper liners but I panicked at the last moment and used
them anyway. Just as a
reminder, I wholeheartedly recommend the If You Care* brand. Nothing stuck at all though the cupcake edges that rested on
the flat surface browned much quicker, a surprise, so testing will be
necessary with this pan. Boo hoo.
So, easy peasy these Boston Cream Pie Cupcakes here folks. And such deeelicious cupcakes on their own too. If anything, add solely the cupcakes to your repertoire. But wait, no, may as well make this whole recipe, you deserve it.
Give a sifty shake of your dry ingredients through a
fine mesh strainer* while you cream up the butter and sugar until fluffy.

|
| On top of a dreary day, I’m testing a new photo editor so bear with me here. Hm. But bad shot anyway. Fluffy butter and sugar receiving one egg here. |
|
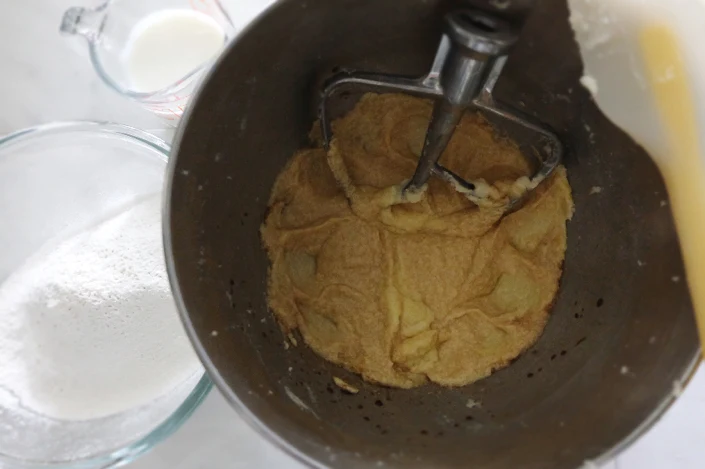
| Even worse photo, apologies. Eggs all in with vanilla, my friends, looks weird. |

|
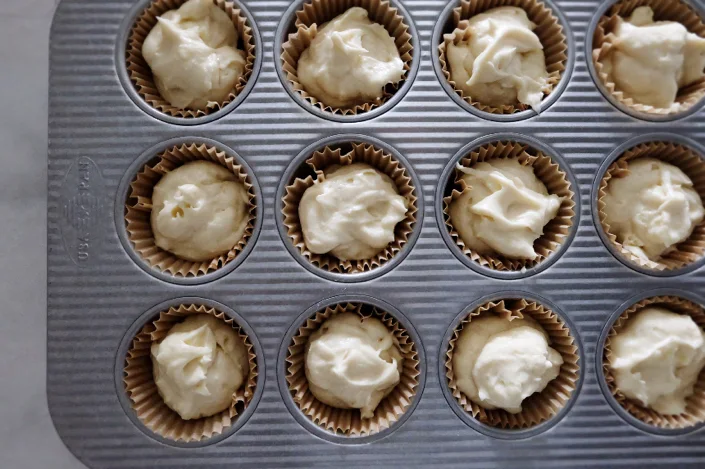
| Prior to a few big healthy stirs by hand, the fluffy pretty batter about to go for a bake. |
Split the batter between the wells of the pan and off to the toasty oven they go. And your house will smell heavenly. Yes.

|
| Had a crummy day, my head not in the game, hence the milk still sitting there. Warm milk first. |

|
| Why is the milk still sitting there? BWD, baking while distracted. But you can see how gloopy the mix gets here. |
Anyway.
Slowly trickle in some warm milk to your yolky sugar concoction to loosen it up, add more warm milk, then strain everything through a fine mesh strainer to eliminate clumpies. Dump it all back in the saucepan, whisk constantly until the whole thing turns pudding-like which is very quick so stay there.

|
| Tempering the egg yolk mix here with the warm milk. I usually pour in more milk than is probably necessary. Whatevs, no harm no foul. Or fowl, ahahahaha, pun. |

|
| Clap clap, it is assembly time, woot! |

|
| That yummy creamy filling filling the void there…. |

|
| Aaaand the cupcakes all plugged back up, stuffed with dreamy pudding filling, just a’-waitin’ on that luxurious chocolate crown. |

|
| Aw boy. I’m dyin’. Excuse me, cough, I have to uh, check on uh something, ahem. Be right, cough, back. |

|
| Yep, see ya. |
Note: This content originally appeared on Flaky Bakers.

*The USA Pan Muffin Tin, If You Care paper liners, whisks, fine mesh sieves, and paring knives are Amazon affiliate links. Happy baking, thanks! Please see the "info" tab for more, well, info.

Boston Cream Pie Cupcakes
Yield
12 cupcakesPrep time
40 MinCook time
30 MinTotal time
1 H & 10 MEverything you love about a Boston Cream Pie, the pillowy cake, the creamy dreamy vanilla pudding, and the rich chocolate ganache yet made into a handheld version.
Ingredients
Cupcakes
- 1 1/2 cups (180 g) cake flour
- 1 1/2 teaspoon (6 g) baking powder
- 1/2 teaspoon (3 g) fine sea salt
- 1/4 teaspoon (1.5 g) baking soda
- 1/2 cup (57 g) unsalted butter, softened
- 1 cup (198 g) granulated sugar
- 2 large eggs, room temp
- 1 teaspoon (5 g) vanilla extract
- 2/3 cup (151 ml) buttermilk, room temp
Cream Filling
- 1/4 cup (50 g) granulated sugar
- 2 tablespoons (15 g) all-purpose flour
- 1/4 teaspoon (2 g) fine sea salt
- 2 large egg yolks
- 2/3 cup (77 ml) milk
- 1/2 teaspoon (3 g) vanilla extract
Chocolate Topping
- 1 cup (170 g) semi-sweet chocolate chips or dark or a combo
- 1/3 cup (76 ml) heavy cream or half and half or milk
Instructions
Cupcakes
- Preheat the oven to 375° F (190° C) and with paper liners, line a muffin tin. For added assurances, spray the flat surface of the pan with cooking spray.
- Add the cake flour, baking powder, salt, and baking soda to a fine mesh strainer over a small bowl and shake to sift.
- In a stand mixer, add the butter and sugar and beat until fluffy on a higher speed, about 3-5 minutes. Turn the machine off, scrape it down, and add one egg with the mixer on stir until combined. Add the second egg, combine, then add the vanilla.
- Sprinkle in about a third of the dry ingredients and stir until barely mixed, then add half of the buttermilk. Alternate dry with wet, ending with dry, and stir until just mixed. Remove the bowl and give a final few stirs by hand with a large spatula, scraping all the way to the bottom of the bowl.
- Split the batter between the wells of the muffin tin and bake until slightly golden and a toothpick tester comes out clean, around 22-25 minutes. Cool the cupcakes in the pan for about five minutes then remove to a baking rack to cool completely before final assembly.
Filling
- In a small saucepan, begin warming the milk over medium heat until it begins to steam.
- Add the dry ingredients, the sugar, the flour, and salt, to a small bowl and whisk to combine.
- Once the milk has warmed, add the egg yolks to the dry ingredients and whisk strongly until a paste forms. Slowly add a portion of the milk to the egg/sugar combo while whisking to loosen the paste and temper the eggs. Pass this mixture through a fine mesh strainer and return it to the sauce pan.
- Turn the heat to just over medium and while continuously whisking, cook the liquid until it turns to a slightly thicker pudding. If when you stop whisking you see big bubbles forming, it is ready. Remove from the heat and blend in the vanilla.
- Pour the cream filling into a small bowl, cover the top directly with plastic wrap, then chill in the refrigerator.
Final Assembly
- In a microwave safe bowl, heat the cream and chocolate at 30 second intervals until the chips have melted completely. Stir until thoroughly smooth, glossy, and it becomes thick.
- With a sharp paring knife and tilting it, carve out a cone shaped piece of cake from the middle of the cupcake at least about halfway down the cupcake interior and around an inch in diameter at the top. Fill each cupcake with about a slightly heaping tablespoon of cream, splitting the cream evenly between all the cupcakes.
- Either trim the cone shaped plugs of cake or place them back whole in the cupcakes. The latter will result in cream being pushed out slightly.
- Top each cupcake with about a tablespoon of the chocolate ganache topping, splitting the chocolate evenly between the cupcakes, and spread across the tops.
- Serve immediately or store in containers to serve later.
Notes:
Original author’s note: Double everything, bake the cake batter in two 9” round pans, and build as a normal Boston Creme Pie.
Adapted from The Kitchn
Nutrition Facts
Calories
267Fat (grams)
12.6Sat. Fat (grams)
7.4Carbs (grams)
37Fiber (grams)
.9Sugar (grams)
24.7Protein (grams)
3.6Sodium (milligrams)
194.8Please see the "info" section for nutrition details.
*The USA Pan Muffin Tin, If You Care paper liners, whisks, fine mesh sieves, and paring knives are Amazon affiliate links. Happy baking, thanks! Please see the "info" tab for more, well, info.








Share your thoughts :
Spam is not good for baking. Please don't leave any, thanks.